So, THIS is the slightly larger project I've been working on.
For Christmas Rachel gave me a book about ritual bathing in tune with the lunar cycle. Man, I love how delightfully witchy that sounds. Anyways. I love the book and have decided to work my way through it's list of different herbal baths. I've started collecting herbs and oils and salts and whatnot, and I decided I needed some accessories to increase my comfort while in the tub to increase the amount of time I could stay in the tub.
After the expense of my Battleshots project, I really wanted to keep this low cost. I had a little bath pillow but I wanted a full size bath cushion to pad my back and hips. I was able to cash in some points for a gift card on Amazon and bought myself this cushion:

https://www.amazon.com/gp/product/B071YQG8R3/ref=ppx_yo_dt_b_asin_title_o06_s00?ie=UTF8&psc=1
It came with a konjac sponge and a carrying bag and after a test run full moon bath last week I can confirm it makes my sitting in a tub much more comfortable.
The other important accessory I needed was a bath tray, a place to set candles and my phone and a glass of wine. (Obviously.)
Sure, you can buy them but damn I didn't want to drop another $50 on a tray. And I also knew that I had a pretty good selection of wood and hardware from old projects, as well as a decent sized plank of wood and a selection of trims and wood scraps my mom had left in the garage, not to mention leftover stain and polycrylic spray for a top coat. I was pretty sure I could come up with supplies to make a bath tray just from what I had on hand. So I set an optimistic goal of not spending any money on this project, and started making plans.
First of all I started looking for tutorials and feature ideas. In the end I didn't really feel like I needed a tutorial, everything was pretty simple, I just needed to figure out what I wanted on my tray. The two main things I needed were a wine glass holder and a phone holder for the ability to watch a show or something while in the tub. If possible I also wanted a hook or holder or something on the edge of the board to hang a towel on so I could easily dry my hands to use my phone. I found a few ideas I liked:

So, sure, I could just do a flat plank of wood, it would do the job, but that's boring.


I didn't really feel like I needed a book or tablet holder like this one, I don't own a tablet and any time I get a book near a tub I have nightmares about dropping it in the tub and ending up with an unrecoverable block of sodden paper. (And yet it's easier for me to bring my $800 electronic phone to the tub? WHAT?) But I really liked the outlined square for the candle there in the corner. Not necessarily for a candle, but to hold a wine glass. This would solve the hanging stem problem. I also liked the raised edge all around the borders to keep things from sliding off. I still had a pile of 1/2" square dowels I had bought thinking I might use them to extend the edges of the panels on my Battleshots to reach the edges of the center frame, but ended up not doing that. I didn't see any reason to return the dowels, you never know what you'll find a use for, and here we go. Those would be perfect to add the wine glass square and the border.

This one had the towel holder I wanted, just have the board extend past the tub and cut a hole in it, I love that. I can do that, my jigsaw is meant for that.

I just like the aesthetic of this one, the darker wood and the white mandala. That's how I decided I wanted to decorate mine. Not sure how I was going to manage the design with my no spending plan, but I could probably make a stencil for it.
The last problem I had was a mount for my phone. I looked at a dozen different ideas for building phone holders, or just routering a notch in the board that it could sit in, but the problem was everything had the phone tilting pretty far back, and I want to be able to sink down into the tub and still see my phone, without it being in danger of ending up in the tub. The closest I got was an idea to add popsicle sticks to a mini easel to make a rest for the phone, but even then, the angle was still wrong and I just didn't like my phone sitting loose like that. I tried to bring my creative mind in and design something, but I just got nowhere. And then I found this:

That, if you can't tell, is a smartphone adapter for a camera tripod screwed directly into the board. And that's....... that's just perfect. It's exactly what I want. The straight on angle, the clamping of the phone in place, it's everything I want. There was no way I could build anything that perfect.
And thus, my no spend goal died. HOWEVER. I did find one for only $5, so really, I'm still not doing too badly. Although that did lead to me buying a stencil for the design in resignation. Since the rule was broken anyways, why not make my decorating plan a little simpler.
I should also note, I loved the handles on this idea but I utterly refused to buy handles for mine. I happened to have a stockpile of old drawer knobs, a very long time ago I had replaced all the drawer knobs on my daughter's dresser with pink crystal diamond knobs. She had outgrown and replaced them, but I saved them. With the help of a gold paint pen I painted them to make them fit my aesthetic a little more and figured I would attach them at the end to give something to grab onto to lift the tray.

I also TECHNICALLY broke my no spend rule here, but I'm not counting it. The screws that came with these knobs would not be long enough to reach through the board and the trim, so I went out and bought some longer screws. However, after a minor side project where I bought a hardware organizer and sorted out my stockpile of screws and nails and washers I've been building for years from hardware leftover from build it yourself furniture, I found that I actually already had some screws that were the perfect length for this. So I'm NOT COUNTING the like $2 I spent on the screws, even if it was only $2. I used the screws I already had, and the ones I bought are unrelated and will be saved for something else.
So. I had an idea for the design, now it was time to build.
My first idea involved the mug rack I made myself when I lived in the apartment I was in previously. I have more cupboard space than I know what to do with in my house so there has been no need for the mug rack and really, nowhere for it to go, so it had just been sitting unloved in the garage. I decided I would repurpose it for this project.
I spent an ungodly amount of time removing all the hooks, those got their own drawer in my hardware organizer, I suppose I'll never need to buy a hook to hang things on ever again! I then briefly attempted to disassemble the pallet without cutting the boards, because the width of the pallet ended up being exactly the length I wanted to have the board extend out for my towel slot, I figured I could just dowel and edge glue probably three board together to get the width.
Well, trying to yank those nails out got old FAST. God, that was hard. I got one board out and immediately decided that sucked. I got out my jigsaw and cut the boards away from the end pieces, then all I had to do was pry them off the center board which wasn't quite so bad. Still a pain though. I figured I'd just add some short boards vertically to the end to make it long enough.
Anyways, got the boards all separated. I went through them and picked out the three straightest nicest looking boards, which was not easy, pallet boards are pretty messy. I then spent a freaking eternity sanding the boards to remove the paint I had put on it for it's mug rack form, and also to smooth out the horrible roughness of the boards. I had sanded them a little when I made it in to a mug rack, but not nearly enough. I knew I would probably not have the patience to sand all the paint off, so I probably wouldn't be able to stain this, it would need to be painted over, but I was fine with that.

After that I lined up and drilled some dowel holes and started working on gluing the boards together. But almost immediately I was in trouble. The first two boards cupped inward dramatically while they were clamped and gluing. I tried to get the third board straighter, but it was still badly curved.
I tried to fix it by clamping the board glued boards to my workbench to force it to be flat and just left it sitting there for like two days, which did help, but it was still pretty warpy. Maybe if I had a planer I could have fixed it? But I could tell I was setting myself up for a world of frustration working with this warpy wavy board. And maybe not going to end up with a great surface for setting lit candles and large glasses of liquid on.


I don't know how well you can see the wave, but it seems pretty wavy to me. You can see it's unevenness better in person, when you set it on a flat surface it's got an awful lot of rock back and forth. It could be worse I suppose, but still didn't seem steady for the things I want to set on it.
At this point, I started thinking about the rather large plank of wood my mom had left in the garage. It was probably five feet tall and a little less than three feet wide, with some random jaggedy parts sticking off of it from whatever what cut out of it originally. I would probably save myself a huuuuuuuuuuuuuge amount of frustration and heartbreak if I just cut myself a rectangle out of that and started over. And I could do it, I'm not afraid of my table saw anymore!


And this is what I had at this point. Obviously the bumpers area not evenly placed, the far edge of my tub is pretty narrow, and the board hangs off the close edge.


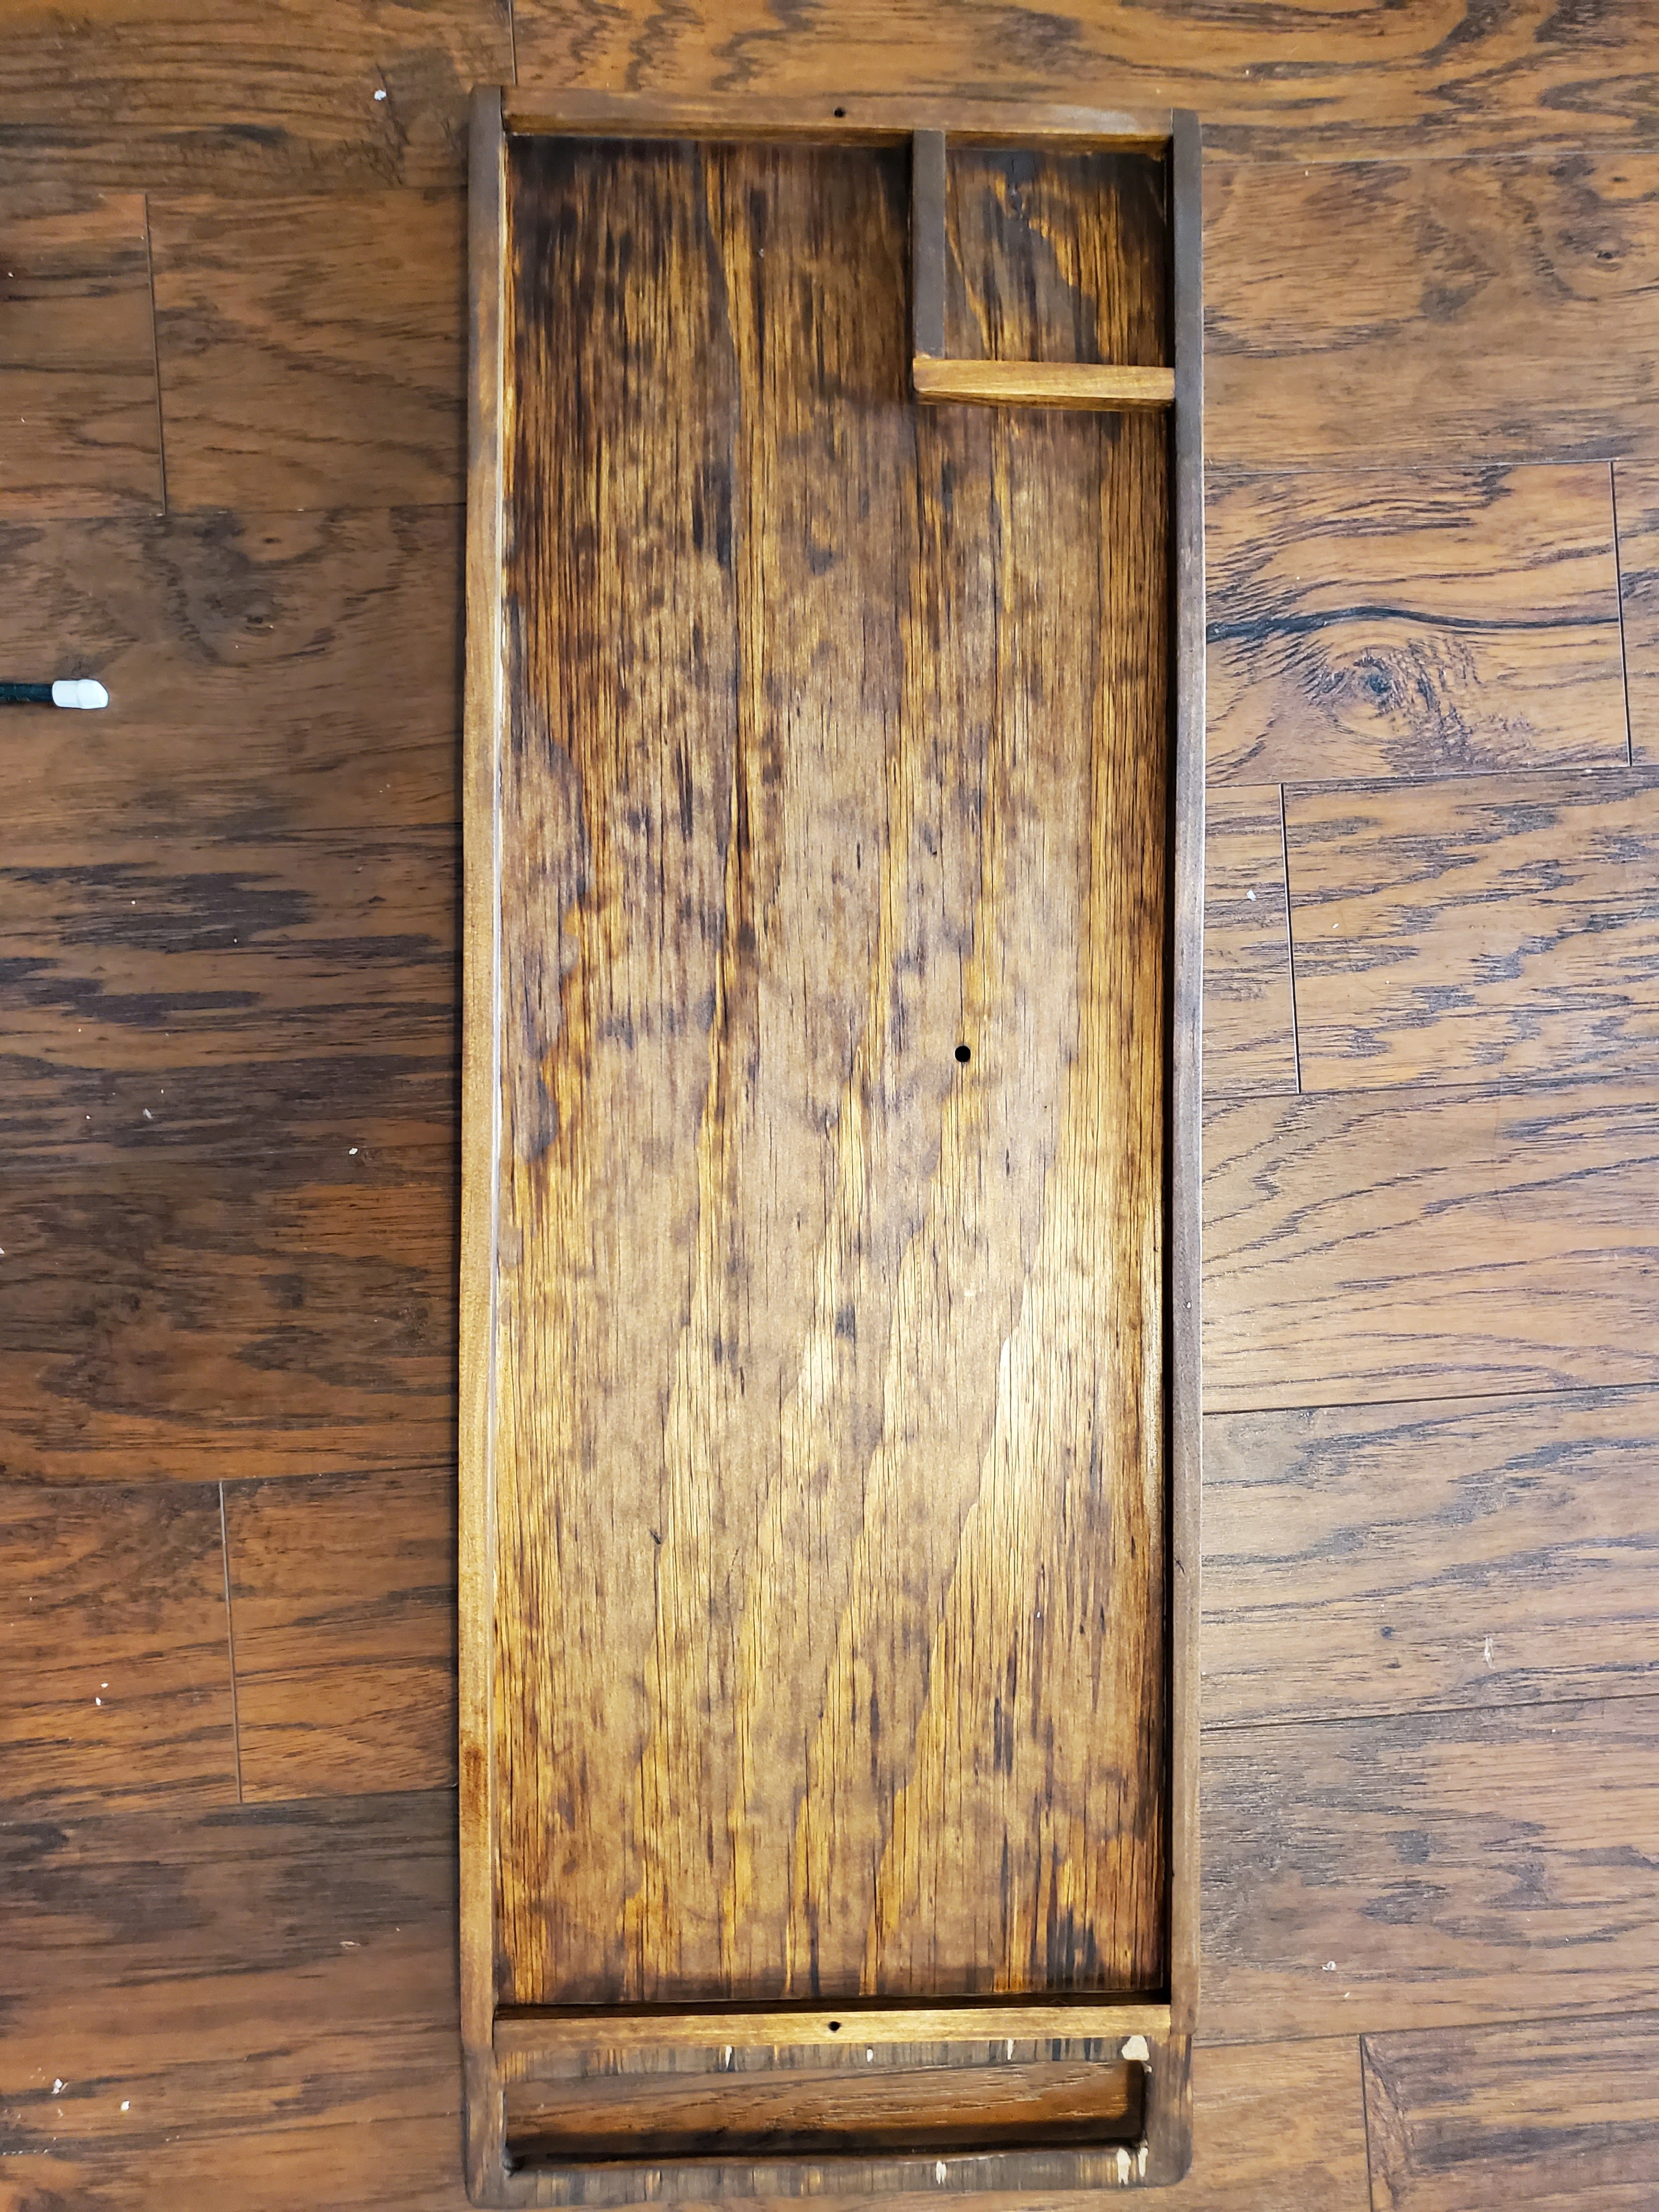
There's a close up of a bumper and the towel holder. Or the handle, as it came to be known after this point. I find it hilarious that my bumpers just have a random routered channel, there's literally no reason for it in this project, it's just the condition my scrap wood. And of course I wanted to glue the flat side down, more surface area for glue security.


I believe this was about three coats. Obviously the filler isn't taking the stain but I expected that. And the wood took the stain in kind of an odd leopard print kind of way, but I'm not mad. I wonder what would have happened if I'd used a prestain conditioner? I should try that someday.
The phone mount hole brought up some interesting issues. I actually put the phone in the mount and put the tray over the tub and sat down like I would if I was taking a bath to get the correct positioning for the mount. And then I discovered I was slightly wrong about the angle I wanted the phone at. The straight on angle of the mount was actually a little too far downwards, I did want it to tilt up. But like, juuuuuuuuuuust slightly. I played with trying to make a little wooden wedge under the front of the mount, I tried cutting wood chunks, which were way too steep, it literally needed just millimeters. I then tried sanding a piece of a paint stir stick to a point which was closer but when I screwed the mount down over it, it just lifted up the whole thing instead of tilting and it was all just a pain. In the end I broke my no spending rule again to get a swivel ball attachment for a tripod that the phone mount screwed directly into and would allow me to tilt it however I liked. If I was going to break my no spending rule for any part of this, I suppose the phone mount is the place to do it, I do want that to be secure and nice.


I'm really really pleased with it. I got the exact look I wanted, with the functionality I wanted. I think it's beautiful and I love it. It wasn't too hard to make either. It took me a while, but that was just because I didn't have a deadline so I just worked on it when I felt like it. No stress, no time crunch. Once I actually use it in a bath I'll stage myself a really pretty bath shot with it actually in use so it looks prettier. But all in all I'm proud of it. And I spent less than $20 on it, which, let's be real, knowing me and my usual unexpected expenses on projects, less than $20 might as well be nothing!