
Tuesday, January 28, 2014
hell yeah, bitches.

Wednesday, January 8, 2014
Is it spring yet?
I'm so bad at waiting for winter to be over. I just hate it so much. I can deal with it at the beginning, because I'm excited to wear my sweaters and boots, and I love the holidays, but by January there's no good holidays left and I'm tired of my winter clothes. I just want my shorts and tank tops and flip flops back. It makes me really want to go shopping for summer clothes. Which is silly, because I have so many clothes that my closet literally cannot fit any more. And that's not a superfluous use of the word literally. I'm not kidding. I've jammed as much as I can in there.
SO. To keep me from shopping, I decided to do some sewing. I have recently fallen in love with the infinity dress, the cute little dress that can be styled a million different ways and is apparently stupidly easy to make. Tutorial for the basic thing here: http://www.soyouthinkyourecrafty.com/little-red-infinity-dress-tutorial/ And here it is!

SO. To keep me from shopping, I decided to do some sewing. I have recently fallen in love with the infinity dress, the cute little dress that can be styled a million different ways and is apparently stupidly easy to make. Tutorial for the basic thing here: http://www.soyouthinkyourecrafty.com/little-red-infinity-dress-tutorial/ And here it is!
This is actually the third version. It's not a complicated dress, but I did some experimenting and learned some things. First of all, I knew I wanted a tube top underneath. (Adding in the tube top is super simple, it's basically just widening the waistband, but the tutorial I looked at for that is here: http://sewlikemymom.com/infinity-dress-with-bandeau-top/) There is no way I can wear something without a bra, and I didn't want to get a special bra so I don't have the band going around my back. The tube top added in is a simple fit. I also learned that the tube top should be the same color as the ties, not the skirt. If it's the same color as the skirt you have to be very careful to cover all the different colored fabric just right with the ties or it looks weird. I have another version of this dress I made that illustrates this issue. If it's wrapped right it looks fine, but it can be a pain. For the ties, I cut them about 12" wide and then folded them over and sewed along the long sides and one end, basically making a long tube with one end closed. I love the light green fabric, you can't tell in the picture, but it's actually sheer. I also know that any stretching on an unfinished edge leads to running and shredding. The tube sealed up all the raw edges. I did not finish the hem of the skirt though. The dark green fabric is just jersey and doesn't have that problem. The tube top is a layer of the sheer light green over a layer of the dark green. I thought I might need to put elastic around the top of it to hold it up, but I managed to sew it tight enough to fit. I have a slight problem with my stitches not wanting to stretch as much as the fabric, even though I did zigzag, so I have to be very careful when I put it on. I just know I'm going to rip the stitches at some point and I'll have to try something else so I don't keep having that issue.
Anyways, the dress is super fun to wear, circle skirts are so twirly! And the fabric is soft and comfy and drapey. I also have a theory that since the tube top only goes down to the edge of my ribs, I'd probably be really cute pregnant in this dress. I was thinking about cutting the skirt a little shorter, but I don't know if I will. I like it the way it is. Now I just need to go learn different ways to wrap it.
Tuesday, December 24, 2013
Christmas Projects!


She's a little awkward looking, but Eloise didn't care.
Next, my first attempt at a corset for someone other than myself:

I feel I did pretty good.
Wednesday, December 11, 2013
Gatomon!
so, I recently introduced Shannon to Digimon, and with her current obsession with pets, Gatomon is her favorite. I happened to locate a pattern for a crochet one, and made it for her for Christmas.

The pattern is here: http://milayou.deviantart.com/art/Gatomon-Plushie-288628972
I made a few modifications. first, she's made with super bulky yarn and an 8mm hook, cuz I wanted her to be huge. I'm not unhappy with how that worked, but I don't think I'll do it again because of the size of the gaps between the stitches.

eyes are cut out of felt, which took some time to get right. They are very important to make sure she looks right. And I know she should have whiskers, but nothing I could do could make them look good, so I gave up.
The biggest change is the shape of her nose and chin. I crocheted a circle for her nose-
6 sc in a magic circle
6 sc around
inc 6 times (12 sts)
12 sc around
*inc, sc* rpt around (18)
sewed that on with the nose attached, and stuffed lightly before sewing closed. That left almost no chin shape though, so I made another triangular piece:
ch 2
sc twice in the second chain from hook, turn (2)
ch 1, inc in both sts, turn (4)
ch 1, inc, sc, sc, inc, turn (6)
ch 1, inc, sc, sc, sc, sc, inc (8)
finish off
(I'm pretty sure I only went to 8. I didn't take notes and I can't remember. If this looks too small, just add another row following the same pattern, inc on first and last st. I was making this up as I went along anyways. There's probably an easier way to shape her face, this is just what I did.)
I sewed this on where her chin would be. it just added a little more shape, so that she didn't have a sunken in chin.

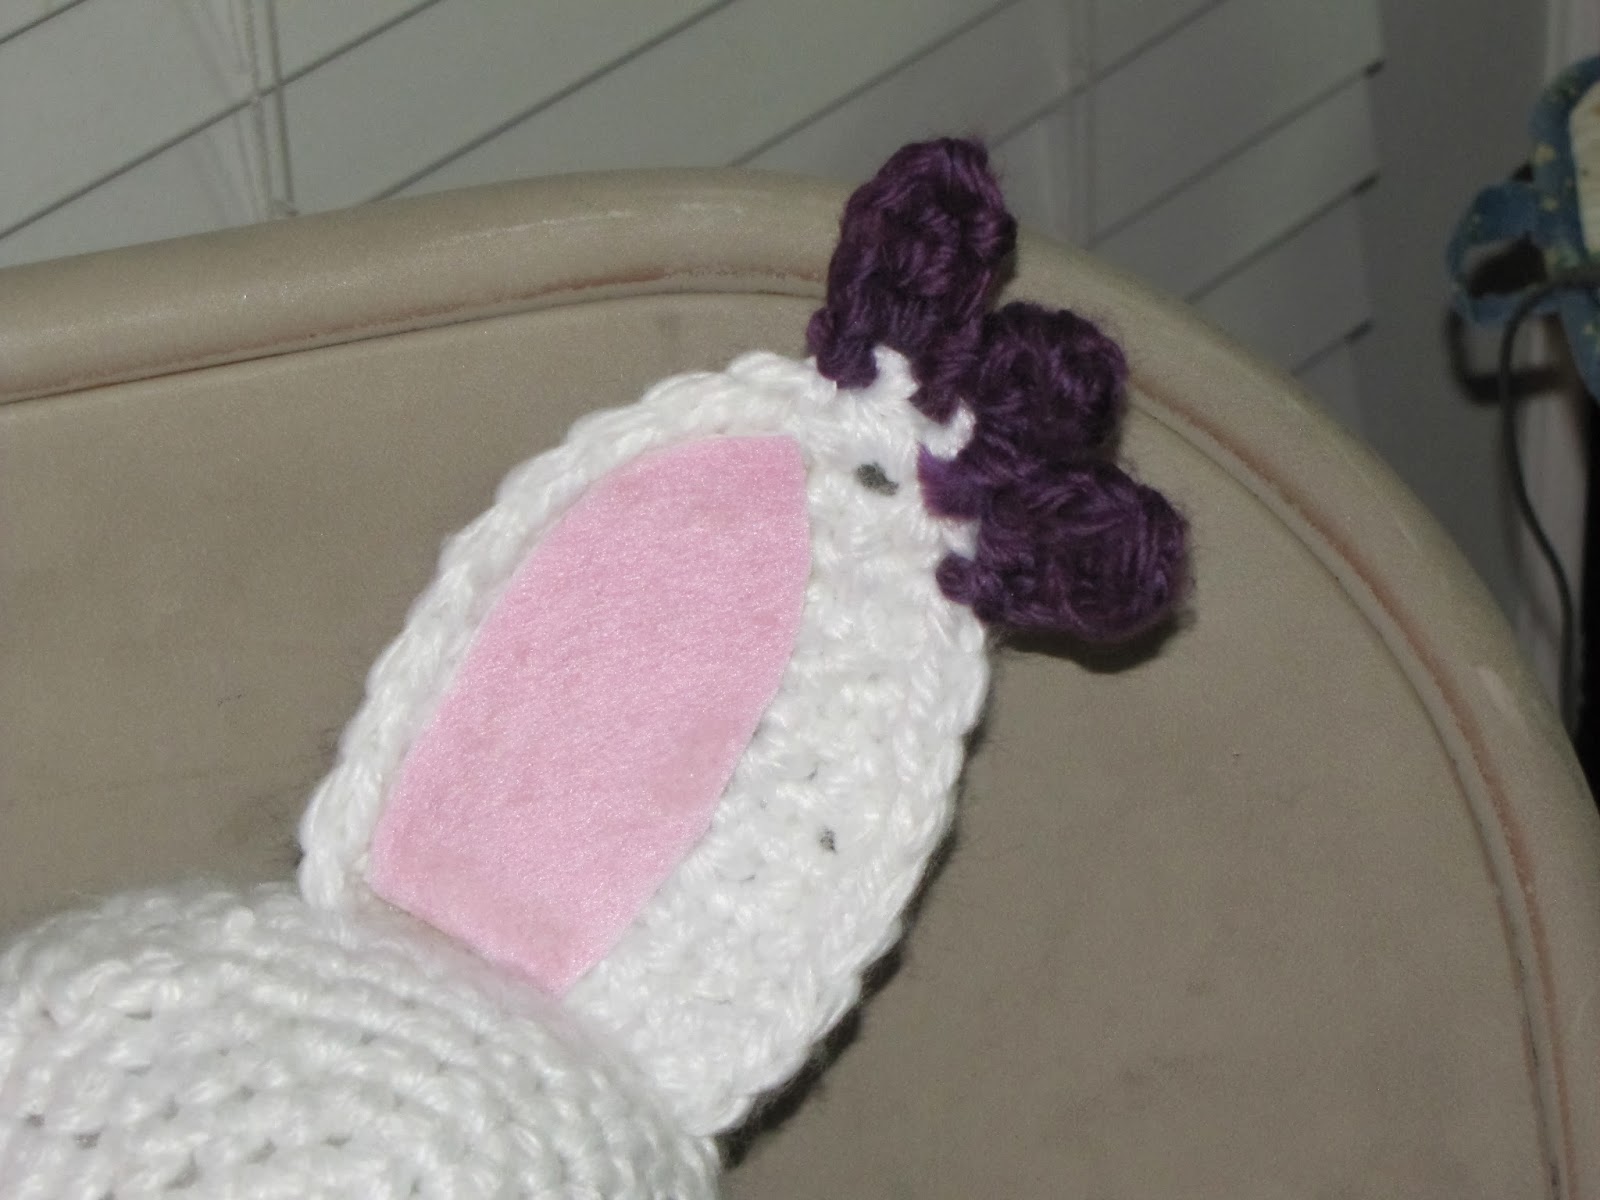
the pink in the ears is pink felt glued to a stiffer white felt and hot glued to the ears to make them stand up.

the claws are just cones of black felt sewn on. I tried to crochet something, I normally hate to use felt for details, but I just couldn't make anything that looked good.

her tail ring is a tube 10 sts around and three rows tall, with a row of sts done through the front loops of the top and bottom round, and then curled outward slightly and stitched down to make the raised edge. It's just stitched to the tail. I also added another repeat of the purple and white rows to the tail, just cuz I wanted it a little longer.
There she is. I think Shannon will be excited.

The pattern is here: http://milayou.deviantart.com/art/Gatomon-Plushie-288628972
I made a few modifications. first, she's made with super bulky yarn and an 8mm hook, cuz I wanted her to be huge. I'm not unhappy with how that worked, but I don't think I'll do it again because of the size of the gaps between the stitches.

The biggest change is the shape of her nose and chin. I crocheted a circle for her nose-
6 sc in a magic circle
6 sc around
inc 6 times (12 sts)
12 sc around
*inc, sc* rpt around (18)
sewed that on with the nose attached, and stuffed lightly before sewing closed. That left almost no chin shape though, so I made another triangular piece:
ch 2
sc twice in the second chain from hook, turn (2)
ch 1, inc in both sts, turn (4)
ch 1, inc, sc, sc, inc, turn (6)
ch 1, inc, sc, sc, sc, sc, inc (8)
finish off
(I'm pretty sure I only went to 8. I didn't take notes and I can't remember. If this looks too small, just add another row following the same pattern, inc on first and last st. I was making this up as I went along anyways. There's probably an easier way to shape her face, this is just what I did.)
I sewed this on where her chin would be. it just added a little more shape, so that she didn't have a sunken in chin.

the claws are just cones of black felt sewn on. I tried to crochet something, I normally hate to use felt for details, but I just couldn't make anything that looked good.

her tail ring is a tube 10 sts around and three rows tall, with a row of sts done through the front loops of the top and bottom round, and then curled outward slightly and stitched down to make the raised edge. It's just stitched to the tail. I also added another repeat of the purple and white rows to the tail, just cuz I wanted it a little longer.
There she is. I think Shannon will be excited.
Friday, November 15, 2013
Shut up, I'm hilarious.


AHAHAHAHAHaHaaaaaa.... I'm so clever.
Here it is:

Here's an upclose of the fabric so you can see the pattern:


I'm very fond of it. and now I have a brown corset with cliche swing hook closures. I don't care if every steampunk corset uses swing hooks, I think they look awesome.
I managed to rescue the front panels from the original corset, although I did have to add a small strip to the edge to have enough fabric for boning channels. And I saved about half of the back panels with the grommets in them. I just barely managed to scrape together enough fabric for the rest of it. I had to redo panels 2, 3, and 4 to correct the fit issue. I had to resize most of the bones, but that wasn't a big deal. I found it was nice to have the front and back closures already done as I was assembling it so I could actually try it on and know it was going to fit before it was finished. I had to use commercial bias tape, since there was barely any scraps of the fabric left, and on the tops of the front panels it's actually only glued down because the bones in front go up too high for me to sew it down.
However, the liner looks great, the inside is very pretty. My best work yet, considering it's a salvaged failure.
Yay!
Friday, November 8, 2013
A New Corset, a Failure and a Lesson
So. I critically failed on my 5th corset. It was incredibly demoralizing. I had bought those cool swing hooks and special predrilled bones to mount them in that I had to get from England, and I was using the cool vinyl fabric that looked like tooled leather. I was figuring out how to add shoulder straps for that underbust with straps look that I love. And I failed so hard. In a few different ways.
In case you're wondering, there are no pictures of the failure. I'm still hoping to salvage it so the hardware doesn't go to waste.
So. Firstly, the shoulder straps. The shape was utterly and abysmally wrong, I don't even know how to describe how they were wrong. they were too long so they didn't rest on my shoulders. The arm hole was too small so the edges cut in to both the front and back of my arm. They were just so, so wrong. Too wrong for me to fix. They weren't a fixable problem, they were a cut-those-fuckers-off-and-start-from-scratch problem. So that was bad enough, because the shape of the corset around my arms was cut around those, so the boning is too long in places to cut them off. However, all this could be fixed with some time and effort. Trim the fabric, trim the bones, resew hems, and so on. There is however, a bigger problem.
I trimmed down the pattern I used.
Now, I had mentioned the wide hips problem of the previous two more recent corsets. Here's the thing I have come to understand: That wasn't caused by the pattern being too wide in the hips. I know, weird, right? I have discovered however that the real problem is the waist. You see, I didn't just cut down the hips, I trimmed the waist a bit more just for fun. I thought, hey, my waist is squishy, let's see if we can reduce by more than two inches!
Spoiler Alert: I can't.
And the result of having a waist that I can't lace tight enough is a hips and ribs section that don't fit. The fit of this failed corset was a tight cord around my waist and a hip and rib section that didn't even touch my body. my torso felt like a clapper in a bell. Now, if I got in to waist training and tight lacing I could probably train my waist to fit this corset, but I'm not going to do that. Corsets are fun, occasional wear for me, not 23 hours a day never take it off deform my body wear.
The moral of the story is, there is a point at which I cannot squish my waist anymore, and I must respect that point or my corsets will not fit.
So, after learning this lesson, and angrily throwing the corset in a corner (I must salvage that hardware, I'm not letting it go to waste. I'm just too angry to look at it now.) I retraced my pattern, left some of the hip width, and smoothed out that waist curve a bit more reasonably. And this story has a happy ending. The result was this:

I realize this doesn't look much different from my other corset pictures, but that's because you can't feel the difference. This sucker molds so beautifully to my shape with a PERFECT waist shape. This is a single layer corset, which was a new experience for me. I splurged on some real coutil, professional corset maker's fabric. Since it was just gonna be a single layer I wanted to use the strong, good stuff. The seams were sewn to the outside, seam allowances on the outside sewn down and used as boning channels, with satin ribbon sewn over to hide the ragged edges. The bust shape was resculpted to curve just right, and OH MY GOD THE WAIST. THE FUCKING WAIST. That perfectly smooth curve. The ribs and the hips fit perfectly, and my shape is just.... god. it's just perfect. After putting this on I spent half an hour putting on all my slim form fitting clothes I'm usually too self conscious to wear and nearly crying because I looked SO GOOD in them. My pattern is FLAWLESS. I'm so fucking happy. And because it's a single layer corset, there's no liner for me to fuck up, so the inside is also gorgeous. Not quite perfect, there's a few places where I had issues with the ribbon binding the edges, but pretty good. Binding is so hard...
Anyways, I'm pleased with myself. I feel it is an excellent recovery from the failed corset.
(also, I apologize for the excessive use of caps and profanity... I may be working on a bottle of wine all by myself tonight... which means I'm sorry enough to apologize, but NOT SORRY ENOUGH TO FUCKING TAKE IT OUT! AHAHAHAHA!)
In case you're wondering, there are no pictures of the failure. I'm still hoping to salvage it so the hardware doesn't go to waste.
So. Firstly, the shoulder straps. The shape was utterly and abysmally wrong, I don't even know how to describe how they were wrong. they were too long so they didn't rest on my shoulders. The arm hole was too small so the edges cut in to both the front and back of my arm. They were just so, so wrong. Too wrong for me to fix. They weren't a fixable problem, they were a cut-those-fuckers-off-and-start-from-scratch problem. So that was bad enough, because the shape of the corset around my arms was cut around those, so the boning is too long in places to cut them off. However, all this could be fixed with some time and effort. Trim the fabric, trim the bones, resew hems, and so on. There is however, a bigger problem.
I trimmed down the pattern I used.
Now, I had mentioned the wide hips problem of the previous two more recent corsets. Here's the thing I have come to understand: That wasn't caused by the pattern being too wide in the hips. I know, weird, right? I have discovered however that the real problem is the waist. You see, I didn't just cut down the hips, I trimmed the waist a bit more just for fun. I thought, hey, my waist is squishy, let's see if we can reduce by more than two inches!
Spoiler Alert: I can't.
And the result of having a waist that I can't lace tight enough is a hips and ribs section that don't fit. The fit of this failed corset was a tight cord around my waist and a hip and rib section that didn't even touch my body. my torso felt like a clapper in a bell. Now, if I got in to waist training and tight lacing I could probably train my waist to fit this corset, but I'm not going to do that. Corsets are fun, occasional wear for me, not 23 hours a day never take it off deform my body wear.
The moral of the story is, there is a point at which I cannot squish my waist anymore, and I must respect that point or my corsets will not fit.
So, after learning this lesson, and angrily throwing the corset in a corner (I must salvage that hardware, I'm not letting it go to waste. I'm just too angry to look at it now.) I retraced my pattern, left some of the hip width, and smoothed out that waist curve a bit more reasonably. And this story has a happy ending. The result was this:

My 6th corset.
Oh. My. God. I realize this doesn't look much different from my other corset pictures, but that's because you can't feel the difference. This sucker molds so beautifully to my shape with a PERFECT waist shape. This is a single layer corset, which was a new experience for me. I splurged on some real coutil, professional corset maker's fabric. Since it was just gonna be a single layer I wanted to use the strong, good stuff. The seams were sewn to the outside, seam allowances on the outside sewn down and used as boning channels, with satin ribbon sewn over to hide the ragged edges. The bust shape was resculpted to curve just right, and OH MY GOD THE WAIST. THE FUCKING WAIST. That perfectly smooth curve. The ribs and the hips fit perfectly, and my shape is just.... god. it's just perfect. After putting this on I spent half an hour putting on all my slim form fitting clothes I'm usually too self conscious to wear and nearly crying because I looked SO GOOD in them. My pattern is FLAWLESS. I'm so fucking happy. And because it's a single layer corset, there's no liner for me to fuck up, so the inside is also gorgeous. Not quite perfect, there's a few places where I had issues with the ribbon binding the edges, but pretty good. Binding is so hard...
Anyways, I'm pleased with myself. I feel it is an excellent recovery from the failed corset.
(also, I apologize for the excessive use of caps and profanity... I may be working on a bottle of wine all by myself tonight... which means I'm sorry enough to apologize, but NOT SORRY ENOUGH TO FUCKING TAKE IT OUT! AHAHAHAHA!)
Wednesday, October 30, 2013
Halloween Costumes
So, Caleb and I had a Halloween party to go to this last weekend, so we needed costumes. We only realized we'd be able to go a week ahead of time, so I had a week to make Caleb's costume. Obviously I was fine, with plenty of options. I wanted to wear Rinoa, but there was going to be drinking, and I spill things when I drink. If I ruined my Rinoa jacket I'd probably cry for the rest of my life. Same issue with my steampunk stuff. I thought about Jessica Albert, but no one would have know who she is. And Ellone, Raine and River Tam are too subtle to be interesting. So I went with Aerith. Did the hair and everything.


Bangs aren't quite as stand-uppy as Aerith's, but you get the idea.
For Caleb, it needed to be simple, inexpensive and fast. He doesn't like dressing up, so I wouldn't be allowed to do anything elaborate or spend a lot of money on it, and it needed to be easy and quick to make. I also wanted to the character to appeal to him at least a little bit. So, I went with the Great Saiyaman from Dragonball Z.


He was a very good sport about it.
He already had black pants, I bought him a black longsleeve shirt. The vest was made using a vague shape based on a t shirt of his. The cape is four triangles buttoned at the shoulders with functional buttons in case he wanted to take the cape off. The helmet Saiyaman wears was not an option so we went with the other look. The bandanna is just a triangle of jersey fabric tied around his head. The sunglasses are some cheap ones we'd gotten for free from some sample site and the earpieces used to be neon orange, so I just painted them. Those were one of our favorite parts, they're the exact same style as Saiyaman's. The belt is a wide strip of elastic with velcro sewn on and a belt buckle made of two circles of foam glued on. The gloves were difficult cuz I've never made gloves other than my failed attempt for Shannon. But I managed. They're just an outline of his hand with interfacing around the cuff for support. They just barely fit. The boots are boot covers I made using the same principles from my steampunk spats, only expanded to fit what I wanted. They have zippers installed in the back and the toes were extended to a point and a cardboard cone glued in. Painted the toes gold and added the lines with a black sharpie.
I'm pretty proud of how it turned out, all his nerdy friends knew instantly who he was and assured me that he looked great.
Hee. I got my husband to cosplay. :D
Subscribe to:
Posts (Atom)