Showing posts with label knitting. Show all posts

Tuesday, April 9, 2013

New Rinoa Project


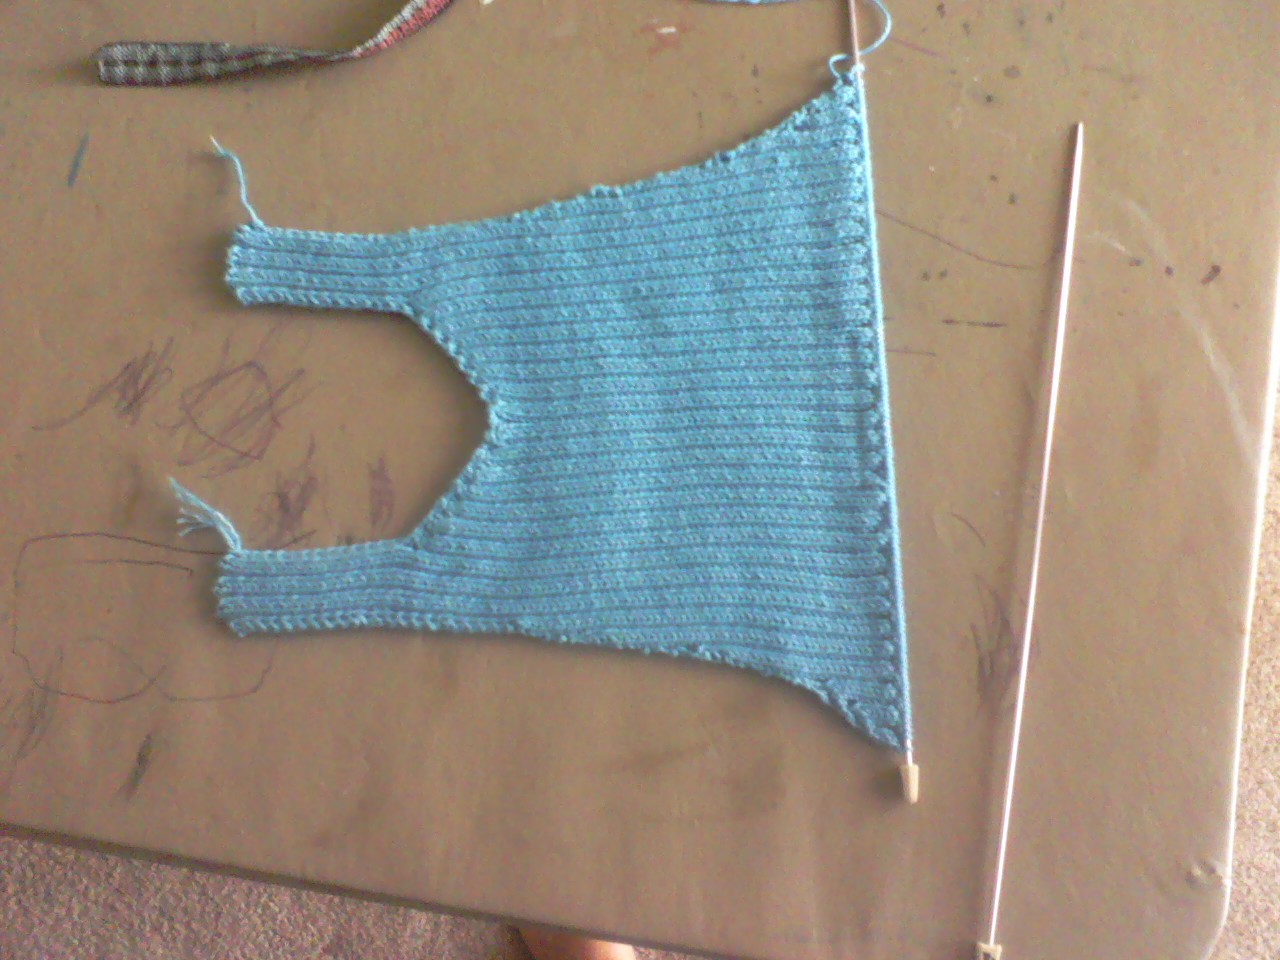
So, if you remember, I mentioned this other project when I was working on my duster.  I wanted to create this outfit of Rinoa's from some fanart I found.  I love this version of Rinoa's outfit.  And, since I ran out of black yarn RIGHT BEFORE THE END of my granny jacket and need something else to do while I wait for the rest of my yarn to ship to me, I decided to work on this.  Already have the armwarmers, obviously.  I have half a dozen black tank tops I can use for this.  I had a plain denim skirt, but it recently came to my attention that the skirt was sitting badly and causing some self conciousness issues that didn't need to be there so I got rid of it.  So I need a new one, but that's not hard.  And I have a plain black belt.  I can't tell what the neclace is, something with wings, I don't know.  I have a necklace that is a winged heart, and I decided to order a Griever necklace, even though she's clearly not wearing Griever, just cuz it's cool and would be appropriate.  I'll figure out something for the bracelet.  Her legs are hard, there's not much to see there.  it looks like some kind of leggings with zippers, or stockings, or it may even be thigh high boots.  Not sure.  I may just do my own thing with thigh high stockings and something else for shoes.  thigh high boots, while awesome, and I do want some, are a bit out of my reach.  Stockings are much easier.  The shrug, of course, I am knitting.  I found a pattern that was simple enough, and close to the right shape.  I had to sit and redo all the math for the number of stitches and rows and whatnot, cuz I'm using the same yarn and needles I did for the duster.  so now, once again, I am knitting and purling on tiny, tiny needles.  sigh....

Wednesday, February 20, 2013

River's Sweater


So, I finished River's sweater.  first of all, the damn thing was huge. I knit it in the large size, aiming for a loose sweater, but I overdid it a bit.  So once I got it put together I actually had to put it through my sewing machine for the side seams and about halfway down the arms just so it would fit better.  That also means the neck is a bit wider than I wanted, and you can see the shoulder seam slides down my arm.

I had a slight moment of panic while knitting this.  After looking at the pictures I realized that River's sweater does not have a visible knit pattern, which made me wish I'd knit the thing in garter stitch.  However, upon completion of the pieces, I realized I was being silly and I could just use the purl side of the fabric and it would be fine.

I added about 5 sm of length to the body, and about that much to the sleeves, plus a little more on the tops.  I added a u-shape to the tops of each sleeve so they would hang over my hands. I don't think that's quite right for screen accuracy, but from what I could tell, the sleeves on her sweater are weird. My yarn is a bit too heavy as well, so my sweater's thicker than hers. but it's very soft and warm.

The skirt's not entirely perfect, the ruffle bother's me a bit, but I tried to make my own skirt and failed.  I can do it and will probably try again, I just don't want to buy more fabric right now.  This is two Goodwill finds that I messed with.  Originally I bought a dark blue and a bright green skirt.  they were cotton, so I knew I could mess with the colors.  So I bleached the living hell out of them.  However, I forgot to account for stitching, which does not change color, and incomplete color fading.  The green one, which I thought I would use for the white layer, faded to a pale lemon yellow, with green stitching all over.  not gonna fly.  However, the blue one actually faded to pink, and I figured as the bottom layer the blue stitching wouldn't be too bad.  The white skirt that I'm actually using was another Goodwill find, just had to clean a small stain out of it that wasn't a problem.  I don't really like to ruffle for what I'm trying to do, and I feel like the white skirt should maybe be slightly pink, or at least a little more sheer so the pink shows through. but that's mostly nitpicking.

anyways, there it is. I like it, mostly.

Friday, February 8, 2013

What I'm doing now and later

So, right now I'm finally, FINALLY working on River Tam's sweater from the episode 'Safe':
I've never knitted a sweater, so I figured if I'm going to learn I might as well make it nerdy. So I found a pattern and yarn and this is where I'm at:

yeah, it kinda looks like a mess now.  but I have faith that it will all come together.

As soon as that's done I'm going to start on a set of little Sailor Moon dolls (like the princesses I made) for Shannon for her birthday.  and once that's done.... oh man.  I have the coolest project lined up.  I'm super jazzed for this.

I found this picture ages ago and fell in love.  I saved it thinking maybe I could figure out how it was done from the pics.  Unlikely.  and then, just recently, I discovered the creator actually put out a pattern for it.  I had to buy it,which I hate doing, I think charging for patterns is mean, but whatever.  If it's something I want bad enough, I'll pay.  (I mean, I paid for the patterns for those princess dolls...)  so I did.  I'm super excited, I think this thing is amazing.  I had trouble picking yarn, the yarn used in the picture is this super special hand painted yarn that would have cost me like $400 to get enough for the jacket.  yeah, not happening.  I went for knitpicks.com, and actually ended up going with the same brand I used for Rinoa's jacket.  I just like the look of that stuff.  I put together a bunch of color schemes and posted them on Facebook to get votes from friends and family on what I should do.  after weighing the options and deliberating for ages, this is what I picked:

a bit different, still bright but not quite as rainbowy.  I like it.  I can't wait to get started on it.  just got to get through the other things in line first.

additionally, I'm creating this outfit right now:

Usagi's outfit, of course.  I've got the shirt almost done, and I already own white shorts, I'll post pics when it's done. (Those are shorts, I promise.  the line dividing her legs is just missing in this shot. it happens.)

and that's what I'm working on.


Saturday, November 17, 2012

The Official Rinoa Heartilly's Duster Pattern

 
Rinoa Heartilly's Duster and Armwarmers


Supplies:

Size 2 (2.75 mm) knitting needles (I strongly recommend 14” length for at least the back panel)
Size 2 (2.75 mm) double pointed needles
yarn needle
white fabric paint
two small silver buttons (The ones I used were 1/2” across)

Yarn
I used Knitpicks.com Shine Sport in Sky, 60% Pima Cotton, 40% Modal® natural beech wood fiber. Anything would be fine as long as it's sport weight. For my length I used 20 skeins of yarn. Online is definitely the cheapest way to go when buying that much yarn. Knitpicks.com is an excellent source, and so is elann.com. Because of the ribbed fabric, I might recommend you use a wool yarn so you can block it flat and have it stay, but I really liked the look of the cotton yarn.

This jacket is a size medium tall, made to fit my medium sized 6' tall frame.


Gauge: 10 rows to an inch, 6 sts to an inch.

Abbreviations:
CO- cast on                   pfb- purl front and back
k- knit                            kfb- knit front and back
p- purl                            sts- stitches


The Armwarmers


CO 60 sts onto three double pointed needles.
Join, knit 2, purl 2 all the way around.
Continue until desired length. 
They took about one skein each. 
Cast off using whatever stretchy bind off you're most comfortable with. I used Jeny's Surprisingly Stretchy Bind Off. (Site with description of bind off technique: http://www.knitty.com/ISSUEfall09/FEATjssbo.php)

Mine were 11 1/4” long. It is not necessary to taper the tube to fit your arm, the ribbed pattern will keep them snug.


The Duster  

The Front Panel (Make 2)

CO 16 sts on to straight needles
knit 2, Purl 2 for 6”

start increasing here. (if you have a preferred increasing technique, feel free to use it. This is just the one I used.)

K2, p2 until the last two sts, pfb the last two stitches.
K2, p2 back across
k2, p2 until the last two stitches, kfb the last two.
P2, k2 back across.

Continue until you've increased to 44 sts. Remember to always increase on the same side. Make sure you're paying attention to whether you're starting with a knit or a purl on the next row after increasing.


At 44 sts your piece should be about 10” long.

Continue knitting without increases until piece reaches from shoulder to ankle. This was 56 ½” total for me. It took about three skeins of yarn.
( I am TALL. Although once it was done I wished it was a bit longer. Make sure you adjust this for yourself.)
I did not bind off any pieces until I had all 3 seamed together so I could make sure they were all the same length, since I didn't count rows.
The Back Panel (Make One)

This is a wide piece, I strongly recommend having 14” long needles for this.

CO 16 sts each from two different balls of yarn. to start with it's gonna be two separate pieces, doing it like this makes sure they're the same length. (Pictures are done with different colored yarn to illustrate what I was doing.)

k2, p2 across both pieces each with their own yarn, for about three inches. so you'll have two completely independent pieces just hanging off the same needle.

 
kfb/pfb depending on what's needed on the last two sts of the first piece on the needle and the first two sts of the second piece. so towards the inside, increasing the pieces towards each other. keep doing this every row until the pieces together measure about 11"-12" across together. that's about the comfortable length to go across my shoulders. I increased each piece to 42 sts.


to join the pieces, do one more row of increases, except after knitting across the first piece, instead of using the working yarn from the second piece to knit it, carry the yarn over from the first piece. pull it tight so there's no gap.
k2, p2 one row after the join to solidify it. piece was 4 1/2" long, about 11" across.

Now, you increase the outsides to go down across your back and under you arms. Increases must be finished when the piece is 10” long to match up with the front panels.

Plain row means k2 p2 across without any increases
increase means kfb/pfb the first and last stitch of that row.

plain row
plain row
increase
plain
plain
increase
plain
plain
increase piece was 5 1/2" long.
plain <---- one inch

plain
plain
increase
plain
plain
plain
increase
plain
plain
plain
plain <--- two inches (eleventh row is extra to make up the length) 6 7/8" long

increase
plain
plain
plain
increase
plain
plain
plain
increase
plain
plain <--- three inches, just shy of 8" long

plain
plain
increase
plain
plain
plain
increase
plain
plain
plain <--- four inches. no need for an extra row. 9 1/8" long

increase 1 st on each side (to make sure we have a complete bar of ribbing)
plain
increase 2 sts on each side
plain
increase 2
plain
increase 2
plain
increase 2 <--- 10" long and 128 sts across.

I realize the increases are unevenly split on the rows, feel free to change this if it bothers you, as long as you have the same number of increases. Do not change the last inch of increases, it is important for the shape to have more increases in the last inch. This is what worked for me.

Again, make sure you're paying attention to whether you're starting with a knit or a purl on the next row after increasing. Since you're only increasing one stitch on each side for the first few inches it's going to be a little strange. Pay attention.

After the final increase row, continue to knit without increases until piece is desired length.  This took about 9 skeins of yarn.


Once pieces are done, seam together using the mattress stitch. I was very careful to pick places for the seams so as to not interrupt the ribbed pattern. This will be awkward if you didn't bind off to make sure that all three pieces lined up. Once you're sure, bind off using the same stretchy bind off you used for the armwarmers. Wash and block.

BLOCKING STRONGLY RECOMMENDED. The nature of ribbed fabric is to pull in, so these pieces will look small. Blocking will set the stitches and stretch out the ribbing so it looks nice. Blocking also provides a perfect opportunity to paint the wings on the back of the jacket.

The Wings

A few notes. I opted to paint them on because that is how it looks to me in shots from the game.
Looks like paint to me.

The image I used for my stencil can be found here: http://www.cosplay.com/showthread.php?t=129189
in the first response from Leradny she has a link to the image. I've included it here just in case. I stretched the image until it took up the entire page. That size seemed to match best to me. Also, make sure to place the wings fairly close to the neckline, they're supposed to go across your shoulder blades.


My method was to paint it on with a sponge using the stencil, but this smudged the details quite a bit. I would suggest adding a bit of water to the paint and using a spray bottle to spritz the paint on. I have a theory that this would go on cleaner. Keep in mind, I have not tried this. I cleaned up my wings by mixing a bit of blue with the white and painting in the smudged details.
Blocking is the perfect time to do this, once it's dry, because it's all pinned down, stretched out and secure.


Stitch the two shoulder straps together once everything is dry. I used a basic whip stitch.

The Trim

CO 8 sts
Knit in stockinette until desired length.
It took two and a little more skeins of yarn for all of it.

you will need three pieces, one long piece to go around the front and neckline of the jacket and two to go around the sleeve openings.
once the pieces are long enough to fit, (length will vary depending on how long you made your jacket.) stitch the two edges together with the knit side out. The fabric will be curling this way naturally because of the way stockinette curls.

Sew the flattened tubes around the edges of the jacket.


For the strips that close the jacket in front make one more small strip the same way about 6” long. This one will be the one you sew the buttons on.

For the strip with the buttonholes, make another strip with the buttonholes at 1 ½” and 3 ½”. Strictly speaking two buttonholes aren't necessary, if you just to one, center it on the piece. For my buttons I made the buttonholes 5 rows long. Vertical buttonholes simply involve switching to a new ball of yarn halfway through to row to create a separation. When I sewed the edges together on the back I simply stitched the edges to the edge of the buttonhole on the front to leave it open.

If ypu have a different method for making buttonholes, feel free. This is just how I did it.


Now you're done! Get a black v neck tank top, a denim skirt and black shorts and go save the world with your knight!


If you have any issues please feel free to contact me, either by commenting, or through my Ravelry account, which is linked in my sidebar. Have fun!

Thursday, November 15, 2012

Here it is!

It's done.  It's finally done.  The trim seemed to take FOREVER.  I suppose, looking at the dates of my posts, it did take a little over two weeks.  I would not have thought it would take that long.


For the trim, I basically knitted a long strip of fabric, 8 stitches across, stockinette stitch, for what felt like a million miles, to go around the front and neckline and the edges of both sleeves.  Stockinette curls up anyways, so it was forming itself into a tube, so I just sewed it shut and then sewed the tube along the edges.

(I do have a minor problem I'm trying to ignore, but I think I'm gonna end up having to fix it.  I didn't measure how long I made the tubes for the sleeves, I figured holding it up to the opening would mean I'd end up pretty much the same on both sides, but I didn't account for knitted fabric's irritating tendency to be entirely different shapes and sizes and different times.  As a result, one sleeve is smaller than the other.  It's not visible when I wear it, but I can feel that one armhole is tighter.  I can detach it and fix it, but it will be a pain.  so, for your reference, I strongly recommend making sure both sleeve pieces are the same size.  which should have been common sense.  sigh.)

The strip for the buttons on the front is the same thing.  sewed the buttons on one and did vertical buttonholes on the other.

Random detail note:  these buttons are smaller versions of the exact same ones I used on the front of my skirt for the rest of Rinoa's outfit so they'll match perfectly.


so there it is.  Took a little over a year, if you include the long hiatus I took.  Five months of real solid work.


It took about two skeins of yarn to do all the trim, plus the ends of other skeins that didn't quite get finished.  so I used almost exactly 19 skeins for this. 

Literally.  this picture I took immediately after finishing at work this morning.  This is the yarn I had left.


So I think I will organize my notes and put together a pattern of sorts for Ravelry, and then not knit again for a long time.

ADFKJGASDFKJLKJHGALKJSDF

THE JACKET.  IT'S DONE.

more info later.  now I just feel like crying from relief.

Wednesday, October 31, 2012

holy hell, isn't this done yet?

so... tired... of knitting.... I want to take a break so bad... but I'm so close... I'm just knitting the trim, and then I'll be done.  but I'm so tired! I'm not gonna knit again for months once I'm done with this.  I need a break.

Sunday, October 28, 2012

Pretty noticable progress.

so here's the three jacket pieces seamed together.  I learned to do the mattress stitch for this, which I really liked.  nice clean invisible seam.


Blocking it was a problem, cuz the thing is big.  in the end I just laid out some garbage bags.  I washed it and then pinned it out.  it took about a day to dry.

there's a tiny part of me that wishes I'd knitted in wool, since you never have to reblock wool...


Painted the wings on while it was still pinned down.  there's a few things I wish I'd done differently.  I printed out a stencil I found online and then painted over it with a sponge and a brush.  however the detail lines of the feathers of the wings got smudged and didn't come out very well.  in the end I had to mix in a little blue to the white and paint in the lines to get the details.  I'd thought about mixing some water with the paint and putting it in a little spray bottle, and I think that might have worked better.  And they should have been painted a bit higher up, closer to the edge.


The armwarmers were just at tube knitted on double pointed needles.  I cast on 60 stitches which was perfect, and they're 11 1/4" long.  each one took almost exactly one skein of yarn. I'd thought about decreasing to taper for my arm getting narrower, but I didn't want to do that and mess with the ribbed pattern.  I didn't need to anyways, because the ribs make sure it fits snugly all the way down my arm.


I have sewn the shoulders together, just a basic whip stitch. So now I'm just making the trim.  I have most of one skein left, and then the ends of a few others from the armwarmer and whatnot.  I have ordered more yarn just out of paranoia, and if I end up not needing it I can do the shrug I want for the fanart thing.  I ordered plenty for that.  and I got some more of the yarn I used for my River Tam vest, because Amanda wants one.   So, for the trim, I'm taking a very basic approach which may or may not work.  I'm knitting a long strip of fabric 8 stitches across in stockinette so it curls. I'll sew it together to make a tube, iron it flat and sew it on.  this is based on the suggestion that I got on the super pretty Rinoa cosplay I found that the trim looked like I-cord.  I did learn how to do it, but it doesn't seem like it works with as wide as I want it. honestly, the bits of yarn I have left will probably go further than I think, and I probably didn't need to get more yarn, but I really do want to do the shrug.

The wings are a bit too far down on the jacket.  they're closer to the middle of my back then my shoulders.  part of that is because the straps are pretty long.  I can shorten them, but I'm afraid of losing too much jacket length.  so I'll take a look at it and see what I think.  I don't think it's the end of the world.  It might be fixable, or it might just be fine the way it is.


Friday, October 19, 2012

I'm a little scared.

Is it normal to be this terrified of finishing a project?  Seriously.  My jacket is scaring the hell out of me.  It took me more than a day to work myself up to actually seaming the pieces together.  And then I stressed for several more hours before binding it off.  To be fair, both were done using techniques I'd never done before, mattress stitch for the seams and Jeny's Surprisingly Stretchy Bind Off for the binding off.  But it's not like they were hard, and I've learned plenty of things off the internet  before.  I guess I'm just terrified of how this is going to turn out.  I'm so scared that this is going to get done and just look awful.  Or maybe not awful.  maybe just a little awkward and clearly homemade, which would almost be worse.  I've never worked this hard on a project I'm actually going to finish. I'm really good at starting projects and then never finishing them.  and this is one of the biggest projects I've ever done. I'm just really scared it's gonna be a waste of time.  A LOT of time.  and pain. and effort. and money, too.  I spent about $50 on just the yarn.  I mean, I've been planning and thinking and planning and thinking about this for a long time.  I mean, the Ravelry entry for it was made November 11, 2011, and that was when I bought  the yarn.  That doesn't take into account the months of planning and math and carefully examining pictures and frustrating online searches that went before that.  so in all, I've been working on this for more than a year.  Not straight through, obviously.  I've only be seriously knitting since July. still, though.  That's about four months. That's some serious devotion coming from me. I can't believe I haven't gotten bored and quit.  It helped that I had Amanda making fun of me and telling me I'd never finish, and Caleb actually caring about this.

and lets not even mention all the flaws I'm picking at in the piece.  (you know that means I'm going to anyways.) the biggest thing I'm worried about is the joins in the first front panel, the lumps caused by the russian and braided joins.  there's bumps in the fabric and I hate them.  only two there, though, after that I started just joining new balls at the edge so I could just tuck the ends into the seams and have no more lumps.  the seam does create an indent in the fabric, which I don't like, although I'm reasonably certain that will block out.  I'm afraid the straps are too long, or will stretch out too long under the weight of the jacket and leave giant gaps at my armpits. that can probably be fixed by just moving the seam on the straps though. 

hey, that was a shorter list than I thought.  which is good.  although the level to which the bumps in the fabric bother me make this list seem huge.

so now, all I have left is the armwarmers and the trim to knit.  and tuck in the ends.  oh, god there's so many ends to tuck in.  why are skeins so small?  and I need to block the jacket and paint the wings on.  I'm very nervous about the blocking, the only place I can think of where I'd have enough space to lay it out is out on the trampoline in the back yard, which has the added benefit of being a place where it will dry faster, but the idea of stretching this out and just leaving it out there makes me very uncomfortable. But it has to be blocked before I can paint the wings on.  I am deeply concerned about the future of this jacket, because I know from my tiny swatch piece, and what I've read about cotton that it won't hold the blocking through the wash.  It'll need to be laid out again after overy wash to keep the ribs lying down.  I really wish there was something I could do to make the blocking stay.  maybe I'll google it.

uhg, also another on the list of things about this that stress me- I think I may have made the first armwarmer too small.  I cast on 60 stitches based on the fact that my ribbed gauge is more like 6 sts per inch than 7.  and now I think I may have been wrong.  GRAAGRLE.

Tuesday, October 16, 2012

OMG!

 Jacket pieces done!  I'm so psyched. for some reason the third skein barely made it to the correct length, which made me a bit nervous, but we got there.  now I get to sew it together!  and paint the wings on!


.... and knit the armwarmers..... and the trim....

god I hope I have enough yarn.

Tuesday, October 2, 2012

second front panel

finished first skein of the second front panel. nothing thrilling.  getting really worried about having enough yarn though.

Thursday, September 27, 2012

Done with the back panel! I'm so fricking excited!
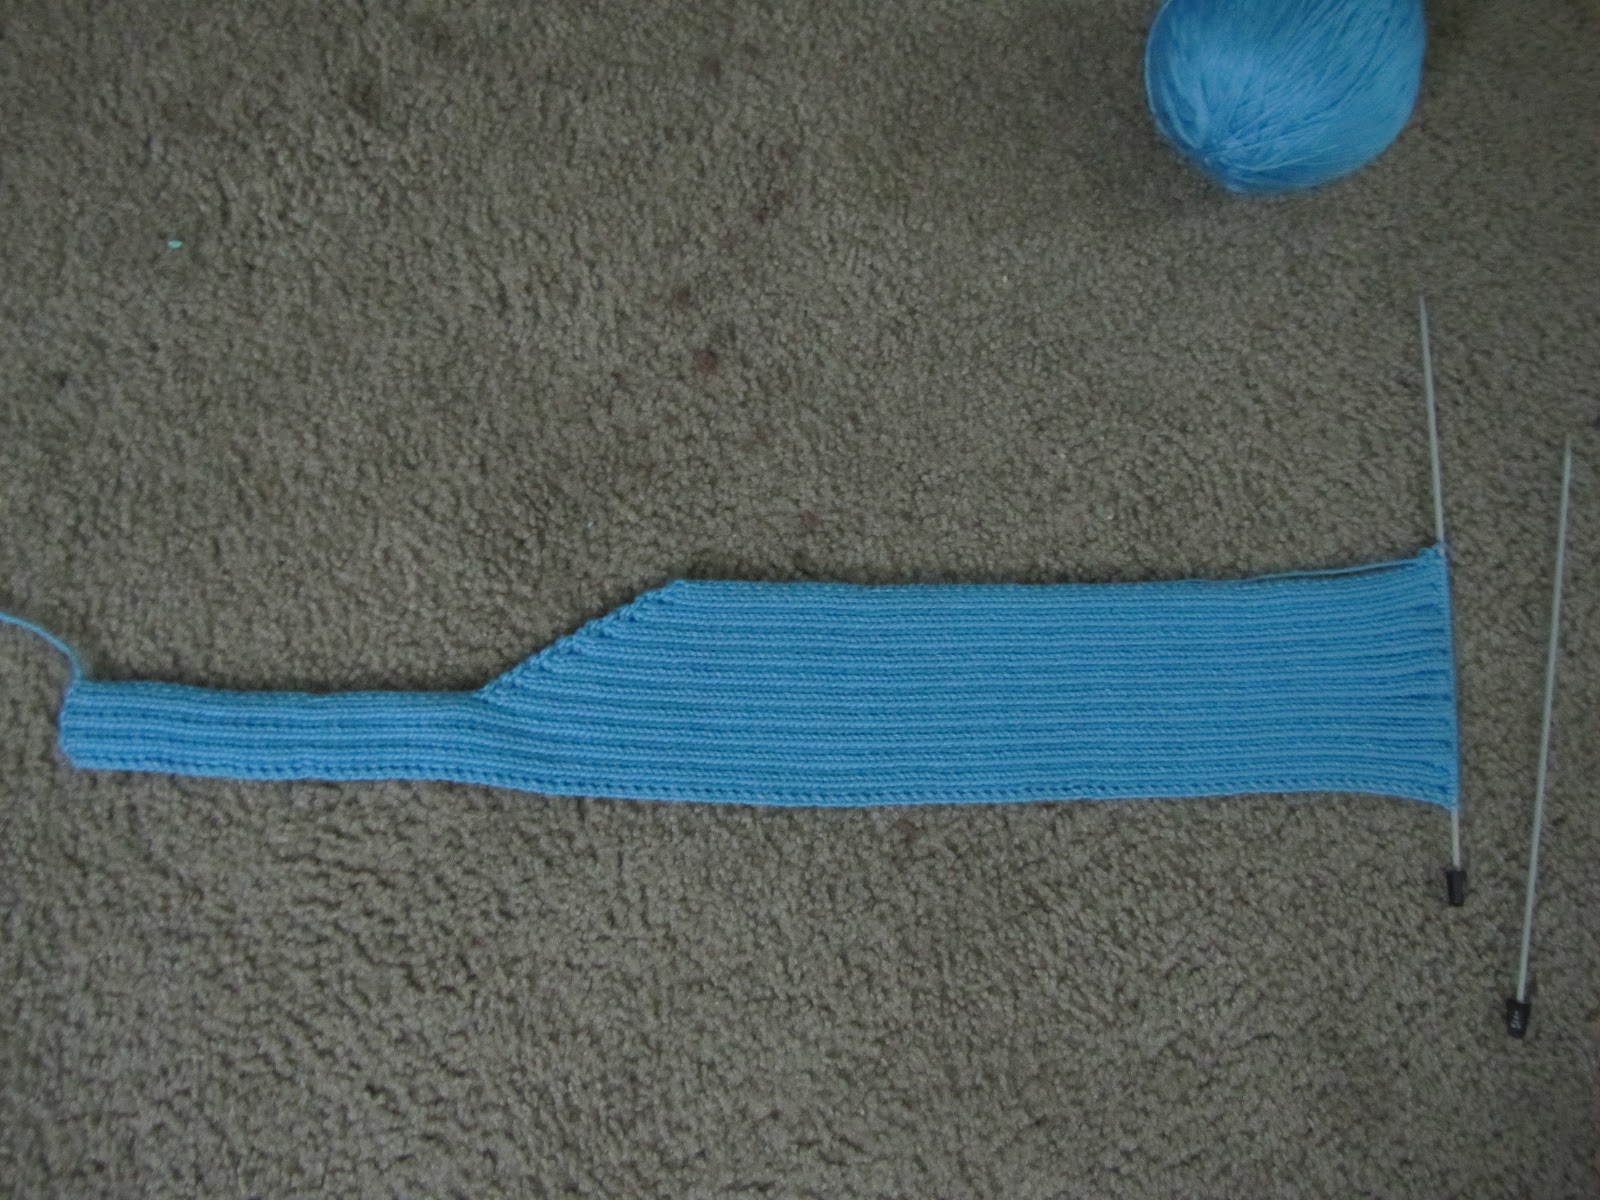
After the 9th skein: and done!
didn't use the full skein to get the length.
total length: 56 1/2"
leaving it hanging up overnight to get some stretching out of the way. and I haven't bound it off yet in case I need to adjust length.
4 1/2" from this skein to hit the final length.  you can see there's a bit of the skein left.


After the 8th skein:
51 and 7/8" long total
6" even out of this skein


aand, those are my cute little toes in the first picture.  :)  I cannot tell you how thrilled I am to be done with this piece.  seriously.  soooooo tedious.  I've started the second front panel now.  it only takes three skeins so it shouldn't take too long.  I gotta tell you, though, I'm really worried about having enough yarn for the trim. I'm hoping the armwarmers will only take one skein each, then I'll have one left, which I desperately hope is enough for trim. I don't want to have to order more.  I guess if I do I can order extra for the shrug for the fanart thing I mentioned.

incidentally, this is the fanart I was talking about:
(source:  http://jessami.deviantart.com/art/Excuse-Me-164912666 )

already have a denim skirt and black belt, would need to make the tank and figure out what to do about the black stockings.  and knit the shrug.  I really want to make it from the same yarn that I'm using now so the armwarmers I'm already going to make would match it. I can't have two different yarns, it would make me crazy.

I figure I can buy a black tank and add zippers, and make a stencil for the white design and paint it on.  I'll probably make the tank cover my tummy though, pregnancy and a tiny bit of weight gain have made me very unwilling to show my stomach.  I already have a pattern picked out for the shrug too.  maybe I should just order more yarn now.... sigh.


Tuesday, September 18, 2012

soon.

After 7th skein:
45 7/8" long total
5 3/4" from this skein


After 6th skein:
40 1/8" long total
6" out of this skein
based on current math, I should only need like 8 1/2 skeins to finish this.  SO excited to be done with this piece.

Sunday, September 9, 2012

getting there...

progress:  after the 5th skein of yarn:
34 1/8" long total
5 7/8" out of this skein.


after the 4th skein of yarn:
28 1/4" long total
about 6" out of this skein.  like, just barely shy of 6"


getting there....

Thursday, August 30, 2012

nothing to see here...

finished third skein.  the whole thing is now 22 1/2" long and this skein was 6" long.  Nothing exciting, I just like to mark my progress. 

Monday, August 27, 2012

Progress... slowly...

Finished up the second skein of yarn on the back panel OMG IT GOES SO SLOWLY.  One skein made it about 5 3/4 inches.  math says that I will need about 6.9 more skeins of yarn to finish the back panel.  that means about 9 total for the back.  which, thinking about it, makes much more sense than 6, as I'd thought before.  the piece is 3x as wide as the front panel, not 2x.  so that means it should take 15 skeins for the whole thing, leaving 3 for the arm warmers, which will still be enough, but there won't be much left over for that fanart thing I was talking about.  I'm considering buying more for that, cuz if I just get different yarn I'd need new arm warmers to go with the shrug.  I kinda need to order stuff from knitpicks.com anyways cuz Amanda wants a River vest for Christmas, and I can't seem to find reasonably priced yarn locally.  ah well.

this is sooooo slow....

Wednesday, August 22, 2012

The Back Panel

Started the back panel, and I've finished the first skein of yarn.  for the record, here's what I did:

process was the same as the test run for the straps, with the two balls of yarn.  while working on it, realized I'd made a mistake.  While math-ing this, I was using my number of 10 rows per inch.  measured the finished front panel and got 9 rows per inch.  I figured if I just started my increases on the sides as soon as I had the straps joined that would make up for it.  once I had the straps joined I measured again and got 10 rows per inch, and realised I LEFT THE FRONT PANEL TO HANG.  you know, to test the stretch? so the 9 rows was after stretching.  which meant I needed to work in a few more rows to make sure this hit 10" long by the time it was 18" wide.  gah.  as a result, my increases seem a bit random  I also realised that 118 +20 is 138, not 128.  apparently I'm a moron.  which means I needed WAY less increases than I thought.  so much stress... add this to the fact that I'm consistently getting 6 sts to the inch, rather than 7, which is the number I based my math on, I was going insane.  I got it figured out though, and this is what I did.

one row after the join to solidify it.  piece was 4 1/2" long, about 11" across. I think. hard to measure ribbing.

inc one st on each side
plain row
plain row
increase
plain
plain
increase
plain
plain
increase            <---- It was here I realized the length problem.  piece was 5 1/2" long.
plain  <---- one inch

plain
plain
increase
plain
plain
plain
increase
plain
plain
plain
plain  <--- two inches (eleventh row is extra to make up the length) 6 7/8" long

increase
plain
plain
plain
increase
plain
plain
plain
increase
plain
plain  <--- three inches   just shy of 8" long

plain
plain
increase
plain
plain
plain
increase
plain
plain
plain  <--- four inches. no need for an extra row. 9 1/8" long

increase 1 st on each side (to make sure we have a complete bar of ribbing)
plain
increase 2 sts on each side
plain
increase 2
plain
increase 2
plain
increase 2  <--- 10" long and 128 sts across.  my math said it should be 126 for gauge.  after carefully stretching across two needles, I believe I have it correct.

so you can see the increases were not evenly spaced because of my mistakes.  if I make this up into a pattern I'll refigure it just for neatness' sake.  the piece looks fine.  I'm just OCD.  now I'm to the point where I just knit straight down for forever.  and with this being 128 sts across, I do mean FOREVER.

Saturday, August 18, 2012

Running out of ways to say "Here's more about the duster!"

 front panel done!  it is 56 1/2" long, just above the ankle, and then I left it hanging up overnight and it stretched out to 57".  My original measurements and guesses were about 58" long, so this is good.  I am worried about stretching, that's why I hung it up, and I'm hoping it won't be too bad.  I've decided to do the back panel next, rather than the second front, based on the fact that the back panel is almost three times as wide and is going to knit much much slower.  I figure this way I'll have a smaller piece after this to give me something that I'll feel like I'm making more progress on.  This piece is probably going to drag.  looking at the dates, it took about two weeks to do the front panel, so I'm guessing at least a month for the back panel.  sigh.